Table of Contents
1. Why Blowing Out Water Lines Matters
2. Tools and Supplies Needed
RV Winterization Tools

Ceoighe 2 Pack Brass RV Blow Out Plug, Heavy Duty Winterization Tool Compatible with Schrader Valve to Blow Out RV Water Lines, Winterization Valve for Camper, Motorhome, Travel Trailer
Ceoighe 2 Pack Brass RV Blow Out Plug, Heavy Duty Winterization Tool…
VIEW LATEST PRICE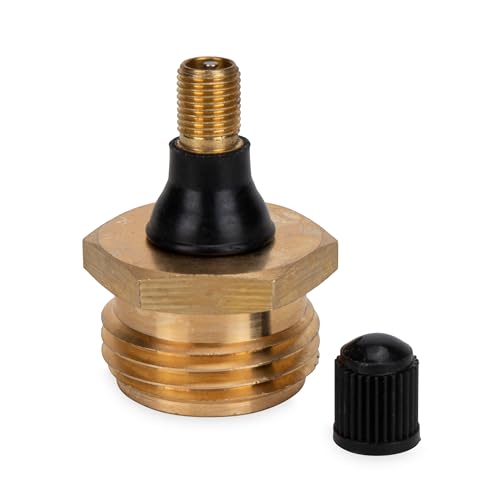
Camco RV Brass Blow Out Plug – Essential RV Winterizing Tool – Heavy-Duty Brass Construction – Helps Clear Your Water Lines During RV Winterization and Dewinterization (36153)
Camco RV Brass Blow Out Plug – Essential RV Winterizing Tool -…
VIEW LATEST PRICE
Winterize Blow Out Adapter for RV, Boat, Motorhome, Camper, and Travel Trailer: Air Compressor Quick-connect Plug to Male Garden Hose Faucet Fitting (Solid Lead-Free Brass)
Winterize Blow Out Adapter for RV, Boat, Motorhome, Camper, and Travel Trailer:…
VIEW LATEST PRICE3. Step-by-Step Process to Blow Out RV Water Lines
4. Extra Tips for Thorough Winterization
5. Common Mistakes and How to Avoid Them
6. Frequently Asked Questions
7. Final Thoughts
1. Why Blowing Out Water Lines Matters

When temperatures drop below freezing, residual water inside your camper’s plumbing can solidify, expand, and cause pipes or fittings to crack. Repairs can be expensive and time-consuming, especially if damage isn’t discovered until spring.
This step is especially critical for RV owners who store their vehicles outdoors or in unheated environments during the winter months.
By using compressed air to blow out your RV’s water lines, you can effectively remove water that might otherwise be trapped in the pipes, preventing costly damage when the mercury drops.
Key Benefits of Blowing Out Water Lines:
– Prevents frozen pipes and plumbing damage
– Reduces risk of leaks in the spring
– Saves money on RV repairs
– Easy DIY task with the right tools
Unlike using antifreeze alone, blowing out the lines physically removes the majority of the water, making it one of the most effective winterization methods.
2. Tools and Supplies Needed

To blow out the water lines in your camper, gather the following essential tools and supplies.
Must-Have Items:
– Air compressor with a PSI regulator
– RV blow-out plug (male or female thread based on your camper’s city water inlet)
– Adjustable wrench
– Towels or rags to catch drips
– Hose adapter if needed
– Safety glasses for protection during the process
Optional but Helpful:
– Water pressure regulator to ensure safe PSI levels
– Non-toxic RV antifreeze (especially for drain traps)
– Sanitizer for flushing the system after winter
Using quality tools makes a big difference in how efficiently and safely you complete the task.
3. Step-by-Step Process to Blow Out RV Water Lines

Follow these steps carefully to ensure your RV plumbing is fully protected from freezing weather.
Step 1: Turn Off Power and Water Sources
– Disconnect the camper from any city water connections.
– Shut off the water pump and let the water heater cool completely.
– Flip the breaker or switch off the water heater (electric/gas) to avoid damage.
Step 2: Drain All Water From the System
– Open the low-point drain valves to empty the lines.
– Open the fresh water tank valve to drain the tank.
– Remove the plug or anode rod from the water heater and let it drain.
– Be careful when removing the anode rod—water may gush out.
Step 3: Open Faucets and Valves
– Open all faucets inside and outside the camper (kitchen, bathroom, outdoor shower).
– Move faucet handles to the center position to drain both hot and cold lines.
– Flush the toilet to clear the water line.
Step 4: Attach the Blow-Out Plug
– Connect the blow-out plug to the city water inlet.
– Use an adjustable wrench to ensure it’s snug but not overtightened.
Step 5: Set Up the Air Compressor
– Adjust the compressor to no more than 30–40 PSI.
– Higher pressure may damage fittings and pipes.
Step 6: Blow Out the Water Lines
– Connect the compressor to the blow-out plug and begin pushing air through the system.
– Start with the furthest faucet from the city water inlet.
– Open one faucet at a time until air flows steadily with no mist or water.
– Repeat this for each faucet, shower, toilet, and outside sprayers.
Step 7: Check Low-Point Drains Again
– After blowing out the main lines, open low-point drains to remove remaining water.
– Some RVs have separate low-point drains for hot and cold water systems.
Step 8: Repeat if Necessary
– Repeat the blow-out process a second time to ensure complete evacuation.
– It’s better to double-check than risk damage from missed water pockets.
4. Extra Tips for Thorough Winterization
– Pour a cup of RV antifreeze into each drain (sinks, shower) to protect P-traps.
– If your RV has a washer/dryer, don’t forget to blow out those lines too.
– Use a water heater bypass kit to avoid filling the tank with antifreeze or air.
– Always winterize the ice maker and refrigerator lines if equipped.
Bonus Tip: Label plumbing valves for easier seasonal switching.
5. Common Mistakes and How to Avoid Them
Mistake 1: Using Excessive Air Pressure
– Never exceed 50 PSI. Use a pressure regulator to stay between 30–40 PSI.
Mistake 2: Missing Hidden Water Lines
– Remember outdoor showers, extra sinks, or optional appliances.
Mistake 3: Skipping the Water Heater Drain
– Always drain the water heater and bypass it if possible.
Mistake 4: Not Using Antifreeze in Drains
– Air won’t push water out of traps. Use antifreeze to prevent freezing.
Mistake 5: Not Repeating the Blow Out Process
– Go through the cycle at least twice for thorough results.
6. Frequently Asked Questions
Q: Can I use a small air pump instead of a compressor?
A: Small pumps usually can’t generate enough sustained air pressure. A compressor is best.
Q: Do I need RV antifreeze if I blow out the lines?
A: Yes, for drain traps and toilets. Blowing out the lines removes most water, but antifreeze offers extra security.
Q: Is blowing out water lines better than using antifreeze throughout?
A: Many RVers prefer a combination. Air for lines, antifreeze for traps and tanks.
Q: Do I need to blow out gray and black tanks?
A: No, just empty and rinse them thoroughly before storage.
Q: Should I sanitize my system in spring?
A: Yes, it’s recommended to sanitize your freshwater system before using your RV again.
7. Final Thoughts
Blowing out your RV water lines is a preventative step that can save you hundreds of dollars in repair costs.
It’s a relatively simple process that ensures your camper is protected during freezing months. With the right tools and a methodical approach, you can complete the winterization process in under an hour.
Be consistent with this process every year, and your RV’s plumbing system will stay in excellent condition season after season.
If you’re unsure about any part of this process, consult your RV owner’s manual or reach out to a professional for guidance.
Happy camping—and even happier winterizing!

